Here at albelli HQ, our love for beautiful imagery and film is always growing. If, like us, you are a fan of footage where fast rolling clouds, whizzing city night lights and sped up sunsets feature, then you may have wondered, “How did they capture all of that in 10 seconds?” Well, the magical time travel technique that was used is called a time-lapse.
So what exactly is a time-lapse?
A time-lapse video is achieved by capturing a large sequence of still shots from the same position at set intervals. These images are then compressed into one file and played back at a fast speed. By using this method you can visually condense an event that lasts minutes, hours and even days, into a few seconds.
How to create a time-lapse?
As you know, we are always up for a challenge, so we created our very own time-lapse of us decorating our office tree as well as a few tips below to get you started.
The first step in creating your own time-lapse is deciding what to shoot! By choosing your subject or focus you can work out how much time you will need to capture the entire process. Whether decorating the house, cooking Christmas dinner, baking cookies or unwrapping presents, all of these fun things could be transformed into a time-lapse video very easily!
You will need:
o A Tripod
o DSLR and an intervalometer – a device used to program your camera to shoot at certain times and intervals. If don’t have an intervalometer, you can always shoot manually. Just remember, you’ll need to continuously shoot for the duration of the event.
o QuickTime Pro or other similar software
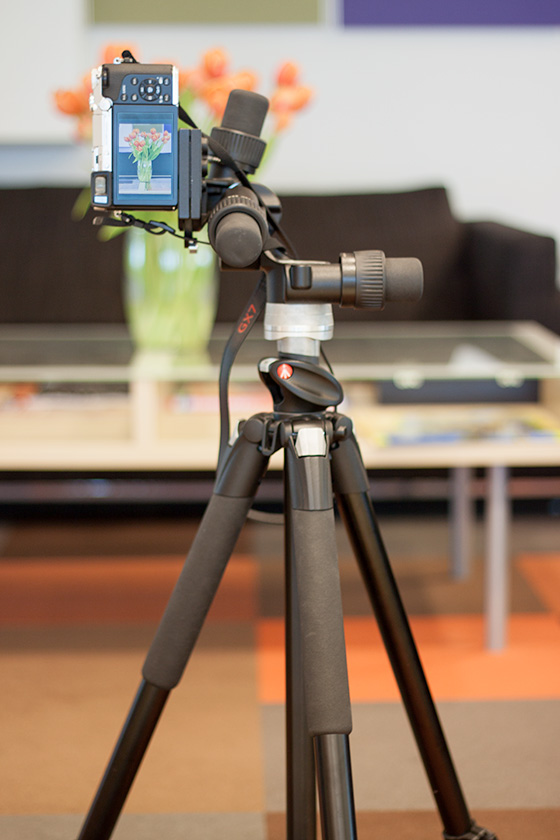
P.S. We used a tripod with a Panasonic Lumix DMC-GX7 which had a setting for time lapse.
Don’t have any of this stuff? No worries, scroll down for another simple method!
DIY: Time-lapse steps:
1. Decide how often to shoot: The higher the frame rate (frames per second: fps), the more you will capture of the event, providing a smoother video. The lower the rate, the blockier the video will be. Most movies show around 20-30 frames per second so your choice will depend on what you wish to snap.
First decide how long you want your finished video to be and multiply it by an average amount fps (between20-30) to determine the number of frames you’ll need. Then divide the length of the event you’re planning to shoot by the number of frames to get the intervals you’ll need to shoot at.
For example, to get a video similar to ours:
• 29 fps times 13 seconds = 377 frames
• 377 seconds to decorate the tree (approx. 6 and a half mins) divided by 377 frames = 1 second intervals between shots
2. Adjust your camera settings: Change both the White Balance and Exposure settings to Manual. This will ensure that every photo is processed in the same way.
3. Get shooting: Now that everything is set up, you should be ready to start snapping!
How to turn your images into a movie:
Once you’ve saved your images into a folder, open QuickTime or another program (we used After Effects) and click on “Open Image Sequence” under the File menu. Choose the “select all” option and decide your desired frame rate. QuickTime will do all the rest for you! Once finished, save and export the file. You can do additional edits such as adding titles, music and other effects in a movie editing program.

However, if all of this sounds too complicated or you don’t have the equipment, you can also create time-lapse videos on your smartphone with apps like Instagram’s Hyperlapse for iOS or alternatives for Android.
Last but not least, share, share, and share! We’d love to see your mini movies so when you upload your Christmas time-lapse videos don’t forget to tag us #albelliAdvent on Instagram, Twitter and Facebook!
Until next time,
The albelli Team